Anycubic Kossel Klipper Enhanced Delta Calibration
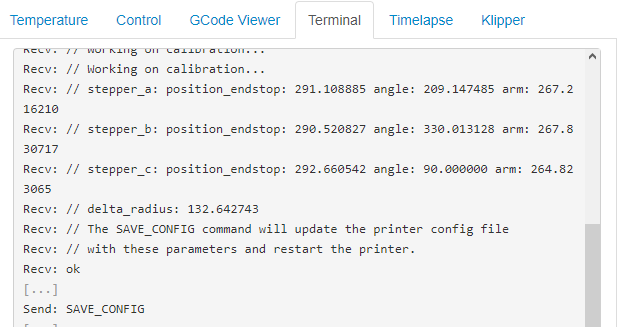
After a succesful delta calibration it is time to do an enhanced delta calibration.
This calibration solves problems with XY dimension problems such as a 19 mm Y side instead of 20 mm.
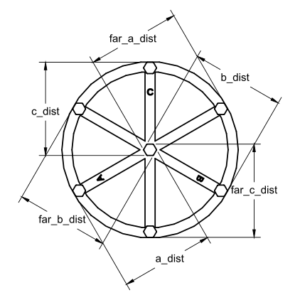
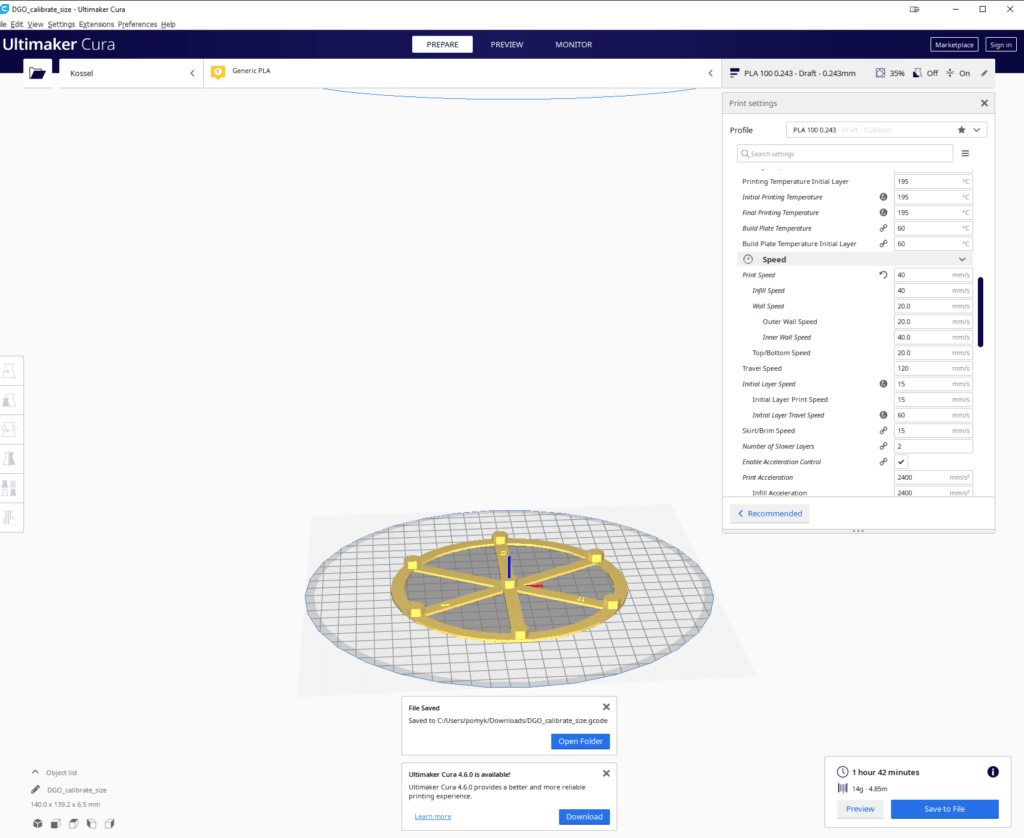
1. Download and print calibration model
I have used the same file as in Klipper Delta Calibration guide and added excel table for calculating average measurement values.
Click on the button, download zip file and extract it.
Open the file in your slicer, use slower speed 20-40 mm/s for better accuracy and print it.
2. Calibration step 1
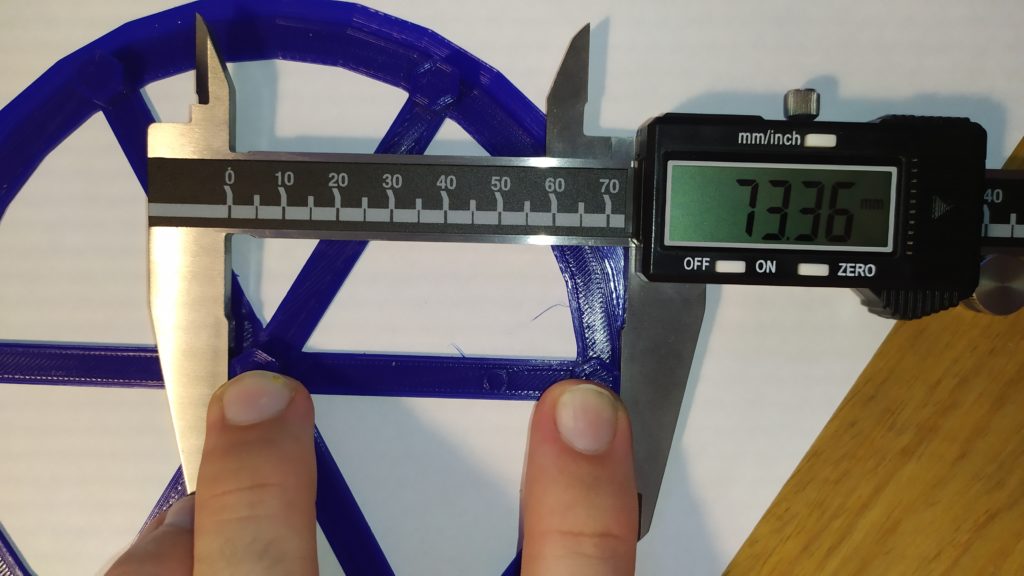
Please be careful while measuring distances.
It is a large model with a low z height, so bends a lot,.
Make sure that you do not apply too much force on calipers.
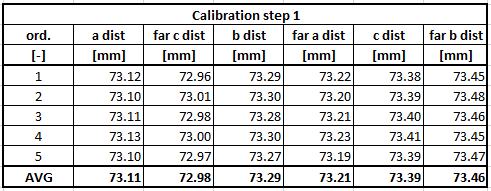
Measure these distances one by one, every dimension 5 times to calculate an average value.
As you can see in this picture, I am pushing both “towers” to the table so it does not bend.
Write down measured values.
Excel will calculate the average value with this formula AVG=SUM(1:5)/Count(1:5).
Prepare you calibration command in this format:
DELTA_ANALYZE CENTER_DISTS=<a_dist>,<far_c_dist>,<b_dist>,<far_a_dist>,<c_dist>,<far_b_dist>
In this case:
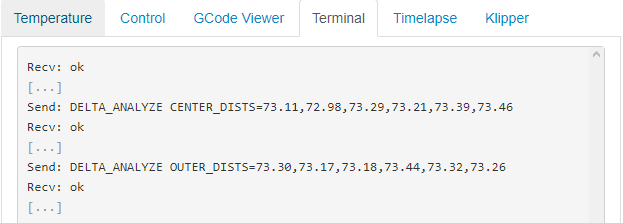
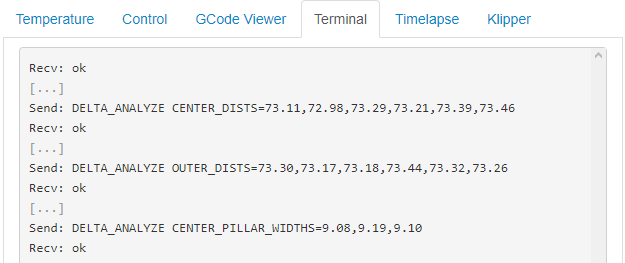
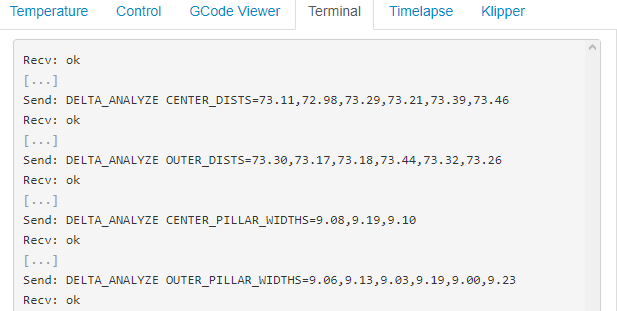
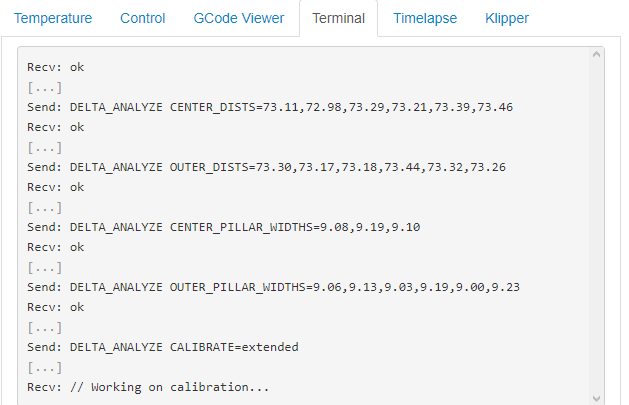
DELTA_ANALYZE CENTER_DISTS=73.11,72.98,73.29,73.21,73.39,73.46
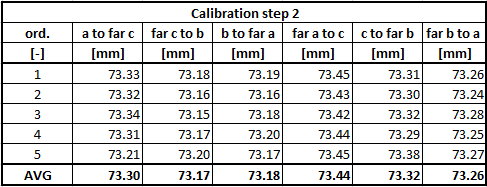
3. Calibration step 2
Measure these distances one by one, every dimension 5 times to calculate an average value.
Write down measured values.
Excel will calculate the average value with this formula AVG=SUM(1:5)/Count(1:5).
Prepare you calibration command in this format:
DELTA_ANALYZE OUTER_DISTS=<a_to_far_c>,<far_c_to_b>,<b_to_far_a>,<far_a_to_c>,<c_to_far_b>,<far_b_to_a>
In this case:
DELTA_ANALYZE OUTER_DISTS=73.30,73.17,73.18,73.44,73.32,73.26
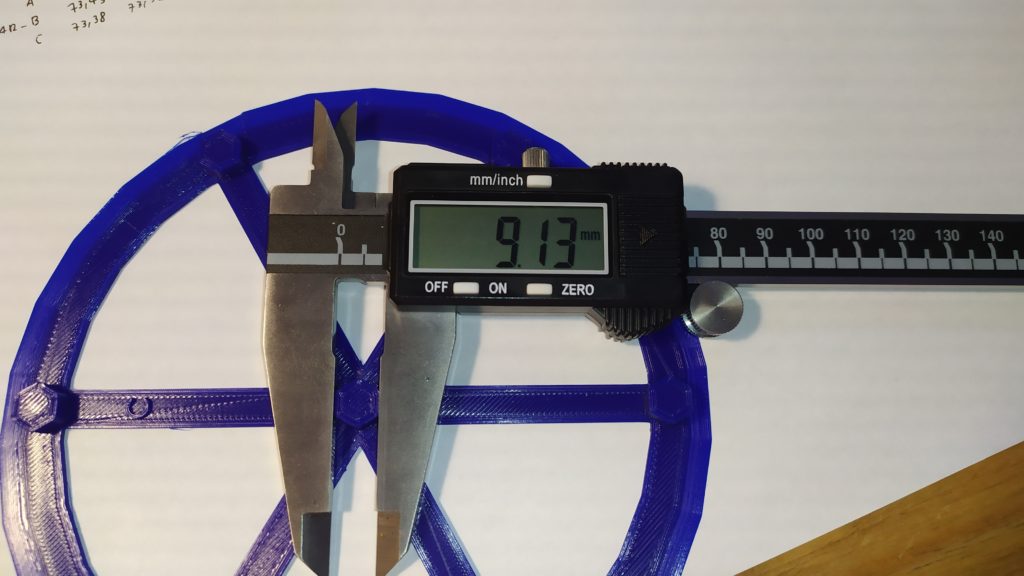
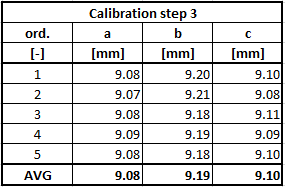
4. Calibration step 3
Measure these distances one by one, every dimension 5 times to calculate an average value.
Write down measured values.
Excel will calculate the average value with this formula AVG=SUM(1:5)/Count(1:5).
Prepare you calibration command in this format:
DELTA_ANALYZE CENTER_PILLAR_WIDTHS=<a>,<b>,<c>
In this case:
DELTA_ANALYZE CENTER_PILLAR_WIDTHS=9.08,9.19,9.10
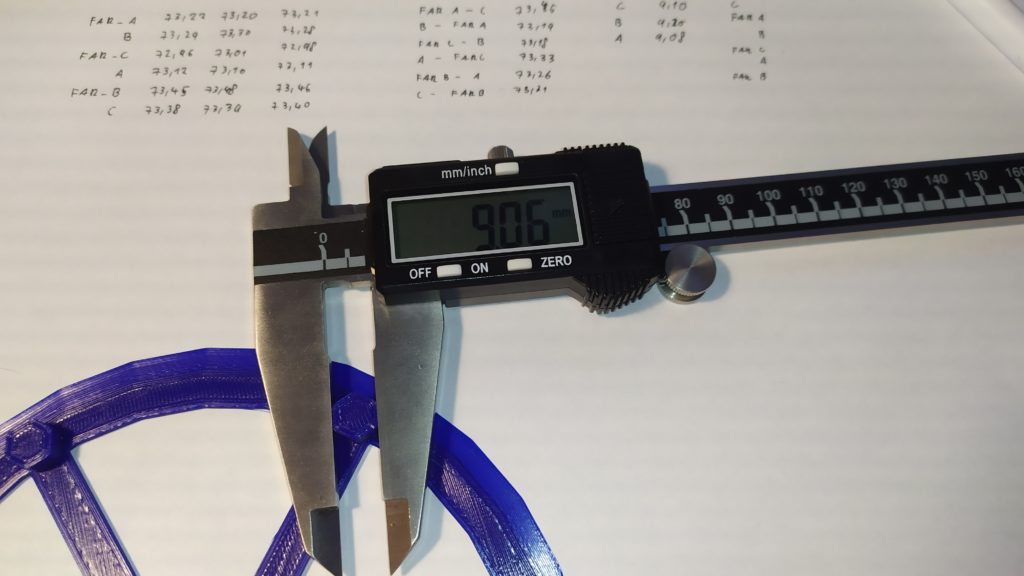
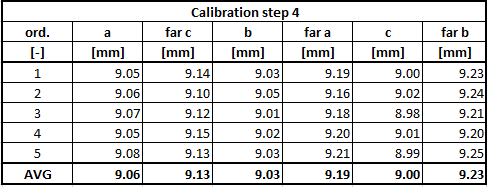
5. Calibration step 4
Measure these distances one by one, every dimension 5 times to calculate an average value.
Write down measured values.
Excel will calculate the average value with this formula AVG=SUM(1:5)/Count(1:5).
Prepare you calibration command in this format:
DELTA_ANALYZE OUTER_PILLAR_WIDTHS=<a>,<far_c>,<b>,<far_a>,<c>,<far_b>
In this case:
DELTA_ANALYZE OUTER_PILLAR_WIDTHS=9.06,9.13,9.03,9.19,9.00,9.23








thanks for your tutorial,it really helps me revive an old kossel
Hi, I am happy to help.
Hi, I recently switched to the new version of Klipper & moved on from OctoPrint to Mainsail.
I’m having some trouble sending the commands for the enhanced delta calibration. I do not get the “Recv: ok” return on the console after sending a command.
I proceeded to send all three commands one-by-one ignoring the lack of OK return and I get the following error in the console, “Not all measurements provided”. Any clue why this is happening?
Okay, I figured this out and it was rather silly of me not noticing that there are four commands and I was only sending three!
Hi Lukas, many thanks for the guide. I’m having problem actually sending the commands. I send DELTA_ANALYZE CENTER_DISTS=,,,,, but I get an error back of “Unable to parse parameter ‘CENTER_DISTS'” Any ideas what is happening?
Hi, send me the complete command.
Sorry, copy and paste didn’t work. Try again. The command is: DELTA_ANALYZE CENTER_DISTS=,,,,,
Hi Lukas, copy and paste keeps chopping off the reply. I’ll type it and see if that works.
DELATA_ANALYZE CENTRE_DISTS=,,,,,
Copied the command from the Klipper Enhanced delta calibration section and just replaced a_dist etc. with my figures ie 74.68
The command is copied from the Klipper Enhanced delta calibration section and I’ve just replaced a_dist etc with my figures.
Hi Lukas, forgive the earlier multiple posts. I have found my error when actually reading your guide properly! I had not removed the left and right facing arrows from each measurement. A case of not seeing the wood for the trees.
Hello Lucas. Many thanks for your guides, I finally got the delta in order and reached the stage of improved calibration. Please tell me if there is a difference from which filament (PLA, ABS, PETG) to print the calibration model?
Hi Lukas,
you have a very nice explanation on enhanced delta cablibration for Klipper. I’m using your Marlin 2.0.5.3, is it possible to do something similar?
Kind regards,
Daan
Hi Daan,
I would like to, but I have not used Marlin for ages.
There should be a command on how to display tower or endstop positions.
THANK YOU from the bottom of my heart. You saved me from creating that excel sheet myself.
Would you probably mind committing the excel sheet to the Klipper docs so a whole community could profit from it? 🙂
Hi Bernhard and thank you!
I have already tried to implement my guides, but they have issues with it…
Specifically on updates, because Klipper guys make a lot of changes in the FW, for example rotation distance and so on…
sorry too much ask, after doing “enhanced delta calibration”… it is okay to do “DELTA_CALIBRATE” again?
Hi, why would you do that?
after advanced calib, my nozzle is little bit far from bed, doing Probe calib not taking effect if not doing “delta calibrate”… what shoud i do?
maybe any other way? like saving z offset? (setting on tune menu while printing)
Hi, that “probe test” works well, but it has a bug in the printer.cfg.
Copy the z probe value from calibration values to the probe value at the beginning of the file, uncomment that line and delete the probe value from calibration part.
Reboot printer/send new printer.cfg file and you are good to go.
thanks… for the advice… i’ll try it later…..
because i’m using 1mm nozzle, can i scale up the object?
Hi, you should stay with original stl file.
Only the letters are about 1 mm wide, the rest should be ok.